About Multi-Version Gradescope Assignments
Gradescope allows instructors to create multiple versions of the same assignment. Please note that this page only describes assignment versioning for Exam/Quizzes and Homework/Problem Sets assignment types. For information on creating multi-versioned bubble sheets, visit our Bubble Sheet Assignments with Multiple Answer Key Versions page.
When Should I Use Assignment Versioning?
Instructors can only use assignment versioning for instructor-uploaded assignments. The feature is not available for students submitted assignments such as student-uploaded Homework Assignments, Programming Assignments, or Online Assignments.
Versioned assignments can vary in length - however each version of the same assignment should be scored out of the same total (e.g., If Exam – Version A has maximum score of 75, then Exam - Version B should also have a maximum score of 75).
We also recommend that, where possible, the assignment formatting remain similar between versions to reduce the amount of effort required to create/update outlines in Gradescope for each version. For example, if Exam - Version A has 25 multiple-choice questions, 5 short answer questions, and 1 essay question, then we recommend that Exam – Version B follow the same format using roughly the same page space for questions. Following this recommendation will reduce or eliminate the need to adjust the outline (designating where questions are located and how they are scored) after a duplicated assignment’s template (PDF with the questions) is replaced with another version.
The Multi-Version Assignment Process
Create the CourseLink-Gradescope Connection
Please follow the steps below to create a corresponding Gradescope site that integrates with your CourseLink course site.
Note: If you already created your Gradescope course integration with CourseLink, please skip to the Create Assignments in Gradescope section.
- Select Content from the navigation bar of your CourseLink course site.
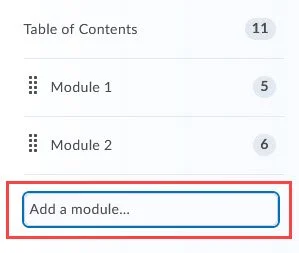
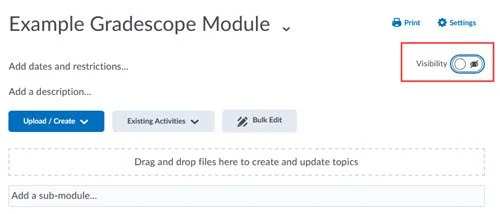
- From the Table of Contents, use the Add a module... option or select an existing module and set it to hidden.
Note: If you would like students to be able to access the assignment through CourseLink, you will want to make the module visible once setup is complete. In most cases, modules should be left hidden from students for bubble sheets assignments or assignments used for final exams.
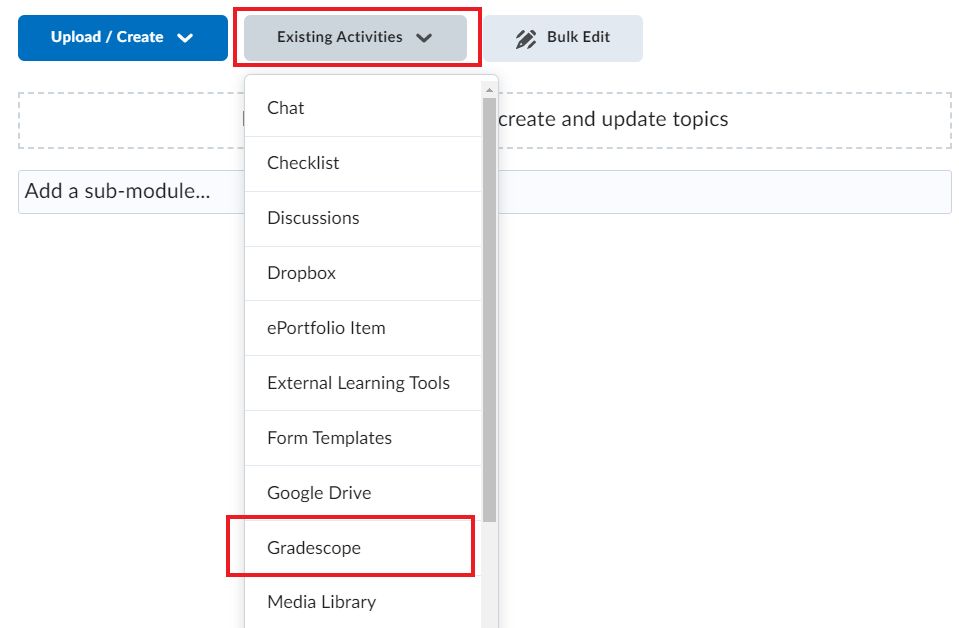
- Select the Existing Activities button and then select External Learning Tools from the dropdown menu.
- Select the Gradescope link that has been created in the module to access Gradescope.
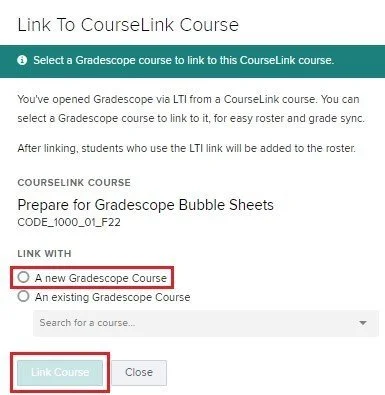
- Gradescope will open in a new tab with your account logged in. From here, you should select A new Gradescope Course under the LINK WITH heading, then press the Link Course button.
Sync a Gradescope Course’s Roster with a CourseLink Site’s Classlist
Once you have created (or linked) your Gradescope assignment through the CourseLink integration, you will need to sync the Gradescope course’s Roster with your CourseLink Classlist. Doing so provides appropriate access to all the participants on your Classlist to the assignments on your Gradescope site. For example, students listed on your course site’s Classlist tool are imported with the student role to the Gradescope Roster. Instructors and TAs are both imported to Gradescope with the Instructor role. TAs can be adjusted to the Gradescope TA role after import if desired. The only differences between instructor and TA roles in Gradescope is that TA names are anonymous to students and TAs are unable to duplicate courses.
Please note that the Roster sync is a manually triggered, on-demand process; it does not happen automatically. As such, it is recommended that you re-sync your Gradescope Roster with your CourseLink site’s Classlist prior to any uploads of submissions to Gradescope to ensure the most up-to-date list is available and all students have the appropriate access if required for the assignment(s).
To sync your Gradescope Roster with your CourseLink site’s Classlist, please follow the steps provided below.
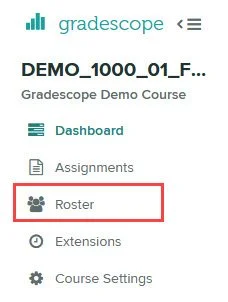
- Select the Roster option on the left toolbar.
Note: If you do not see the Roster link, you are likely accessing a specific Gradescope assignment. You will need to move back to the course's Dashboard by clicking the course code in the left menu, then the Roster link will be available.
- At the bottom of the page, click on the Sync CourseLink Roster button.
Note: If this is your first sync, the option to sync with CourseLink will also be presented in the middle of the page.
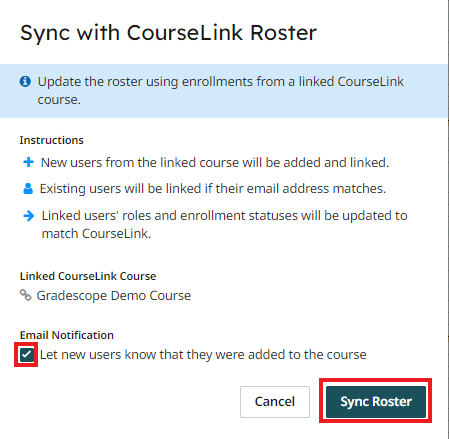
- You will be prompted to select if you would like users to receive an email notification informing them that they have been added to the Gradescope course (enabled by default). If you would not like to inform them, uncheck the box. Then click the Sync Roster button.
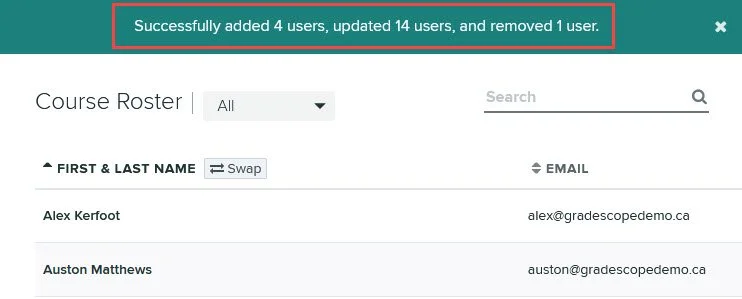
- Once the sync completes, a confirmation will appear at the top of the page along with a summary of how many users were added, updated, or removed.
Create Assignments in Gradescope
Instructors should visit gradescope.ca and sign in using Single Sign On.
Create assignments in Gradescope.
Visit our Gradescope Support page for step-by-step guides on creating different assignments. Remember, only instructor-uploaded assignments are compatible with the versioning feature.
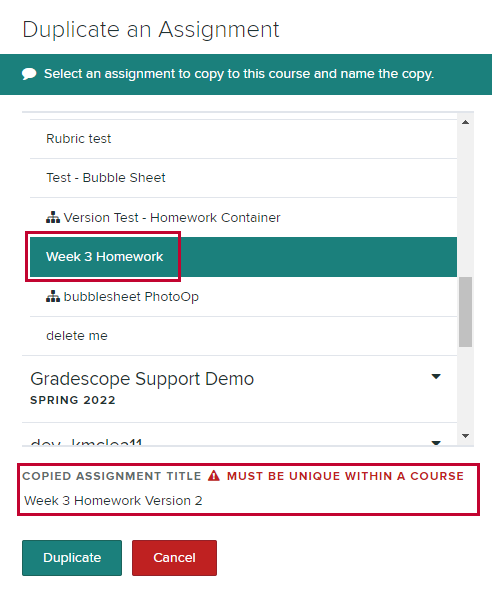
Note: To create a second version, instructors may either build another assignment from scratch or click the Duplicate Assignment button on the Assignment page.
From there, instructors select the assignment they would like to copy and add a new name for the second version.
After duplicating an assignment, instructors should replace the template PDF for the second version from that assignment’s Settings page.
Create the Version Set (Assignment Container)
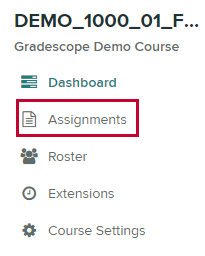
- Click the Assignments button on the left sidebar of the course.
- Select Organize Assignment Versions from the bottom of the page.
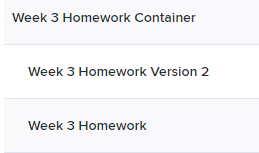
- Choose the instructor-uploaded assignments that will be linked together, name the version set, and then click the Create Exam Version Set button.
CourseLink Integration
Now that the multiple versions have been created, the assignment can be linked to CourseLink. Doing this creates a single grade item that will receive scores from ALL versions when the Gradescope grades are posted to CourseLink.
- Access your CourseLink course site and select Content from the navigation menu.
- Select the module you created when you linked your course site with Gradescope. Alternatively, you can create a new module.
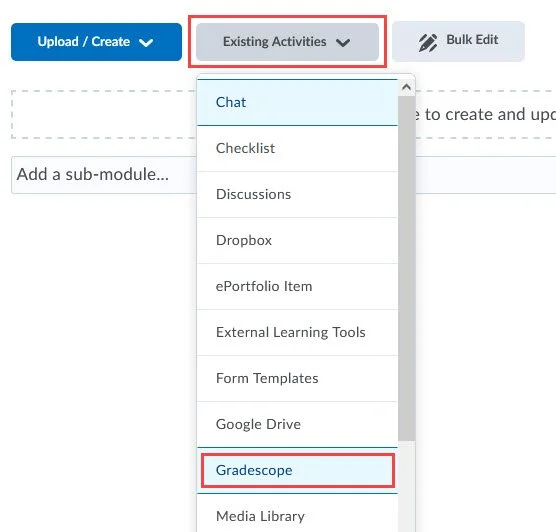
- Select the Existing Activities button and then select Gradescope from the dropdown menu.
- Select An existing Gradescope Assignment, select your multi-version assignment container, and then press the Link Assignment button.
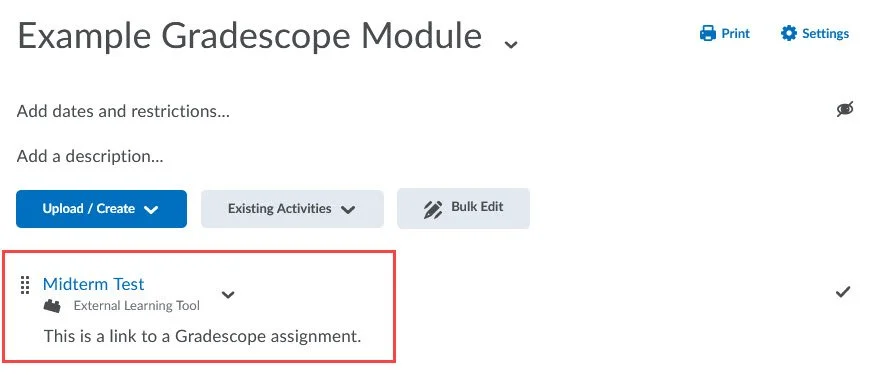
- The Gradescope assignment created in a corresponding Gradescope course is now integrated with your CourseLink site and can be accessed from the link created in the Content tool.
Note: A corresponding grade item has also been created in the course site that is visible to students and set with default Maximum Points (1), provided you did not complete the answer keys, and the default Weight (10). It is recommended that you modify the grade item settings as required at this point.
Modify the Grade Item
- Access Grades from the course site's navigation bar and be sure you are on the Manage Grades page.
- Locate the Gradescope assignment's associated grade item.
Note: It will have the same title as your assignment and should be located just above Final Calculated Grade.
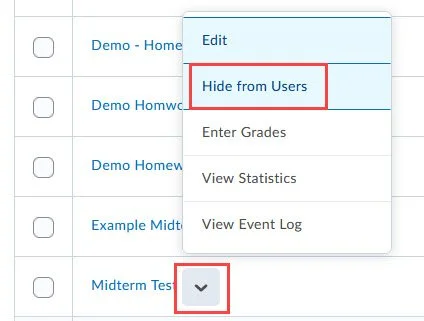
- Select the context menu (down-facing arrow) and select Hide from Users to ensure students cannot see the item.
Note: It is recommended to hide the grade item to allow you to review the grades in CourseLink after they are transferred from Gradescope. Then you may release the grades to students by making them visible (if desired).
- Next, you will want to adjust the default values for Maximum Points (1) and Weight (10) of the grade item associated with your Gradescope assignment. Begin by clicking the Gradescope assignment grade item's title.
Note: If you do not know these values yet, remember to update the item prior to posting grades to CourseLink from Gradescope.
- Enter the appropriate values under Maximum Points and Weight, then press the Save and Close button.
Note: Gradescope creates the grade item with the Can Exceed option enabled. This allows you to include bonus questions in your Gradescope assignments. There is no need to disable the option if you are not using bonus questions.
Upload Submissions
- Assignments should be scanned and saved as a PDF(s). Gradescope recommends using a separate PDF for each assignment version.
- Click on a version of the assignment from the Assignments page within your Gradescope course.
- From the Manage Scans page, instructors upload the corresponding PDF file(s).
- Repeat Steps 2 & 3 for each assignment version.
Grade Submissions
Each version must be graded individually. The same grading process applies here as for single-version assignments. Select an assignment type for further, assignment-specific grading information:
Review/Release Grades
- From the Review Grades page, instructors can view data from across assignment versions. Beside each student’s name, the version will be recorded.
- To publish feedback for students on Gradescope, select the Publish Grades button at the bottom of the page.
- To push grades back to CourseLink, select the Post Grades to CourseLink button. Be sure that the CourseLink Integration described above is complete or this button will not be available.
Also ensure that the corresponding CourseLink grade item has been modified with the proper weight and point values for the assignment prior to posting grades.
Additional Support
The Gradescope Help Centre provides additional information on creating and grading multi-version assignments.
Gradescope Support
Additional Support information for Gradescope can be found on our Gradescope Support page.
If you need further assistance, please contact CourseLink Support.


