
Video Note
What is Video Note?
Video Note is an option available to instructors and students to create short videos of up to 30 minutes in length. Video Note is available with the following tools:
Announcements
Content
Discussions
Dropbox
How to use Video Note in Announcements
Select the drop down arrow next to the Announcements tool on your course homepage (the first widget located under the course banner image).
Select New Announcement.
Add a title for your announcement in the Headline field.
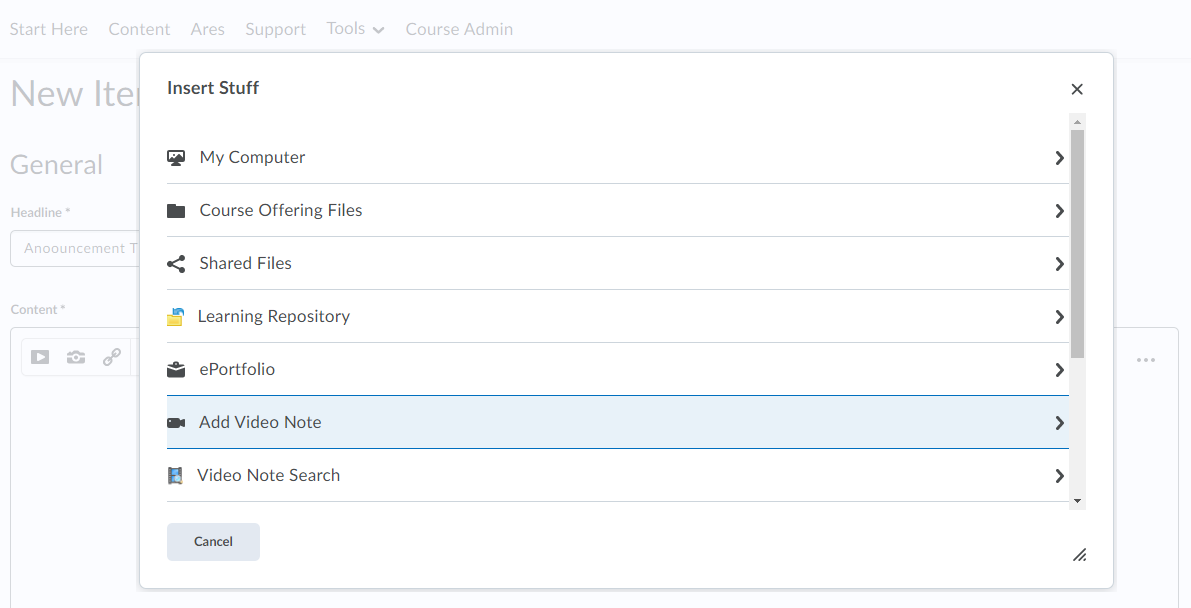
Select the Add Stuff icon
Select the option for Add Video Note.
You will have two options available - Record Webcam Video or Upload File (if you already have an existing video that you would like to use).
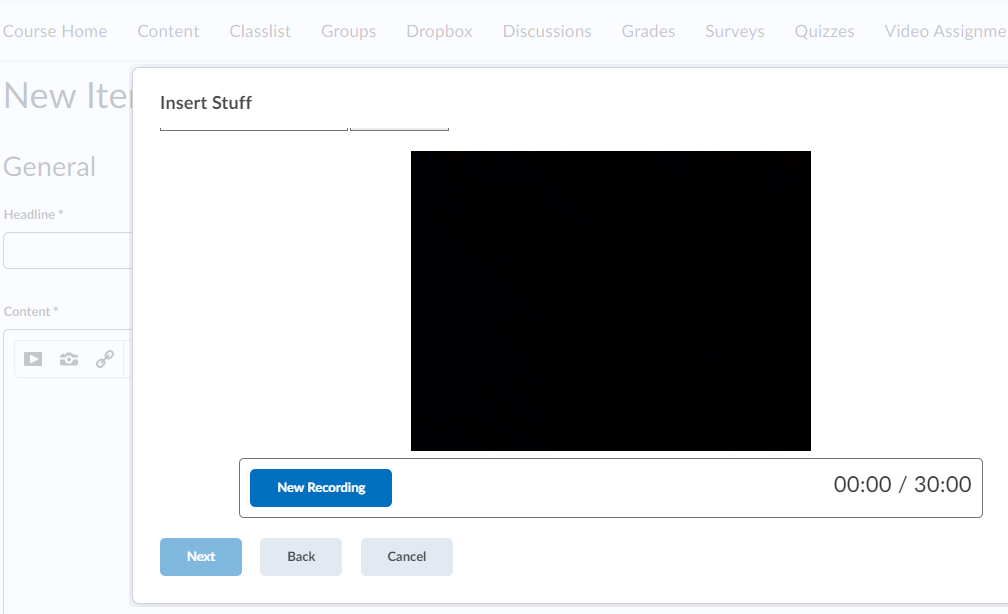
If you’d like to Record Webcam Video, scroll down to where it says New Recording.
Click the New Recording button to start your recording.
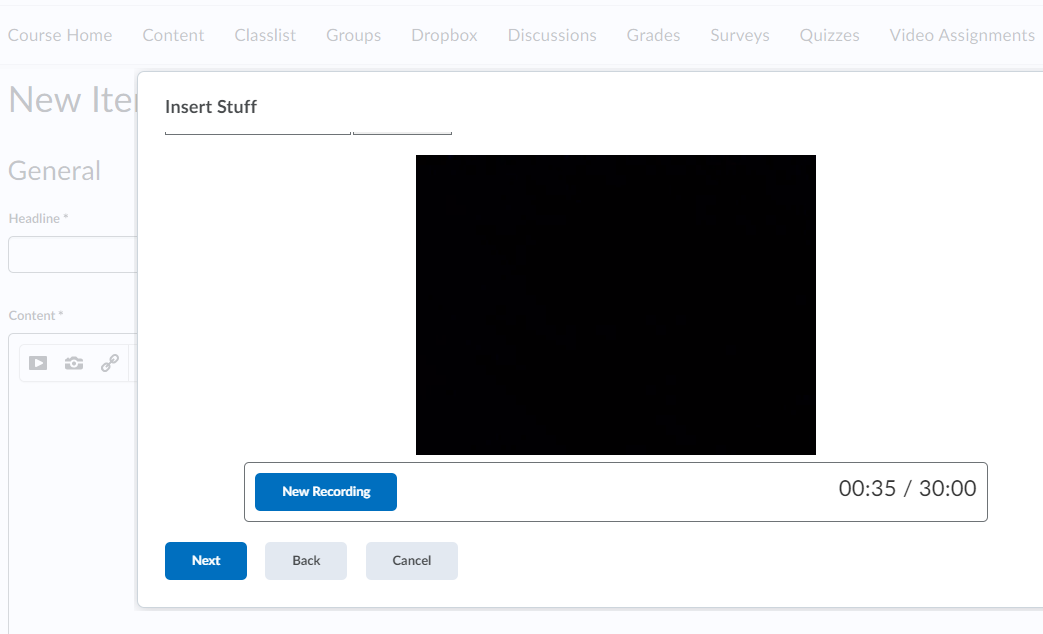
Note: if this is the first time you are using the tool the browser will ask you to allow webcam permissions. Please enable this permission.Click Stop Recording when you are done with your video.
Review your recording at this step. If you’d like to try again click New Recording to restart the process. If you are satisfied with the recording click Next.
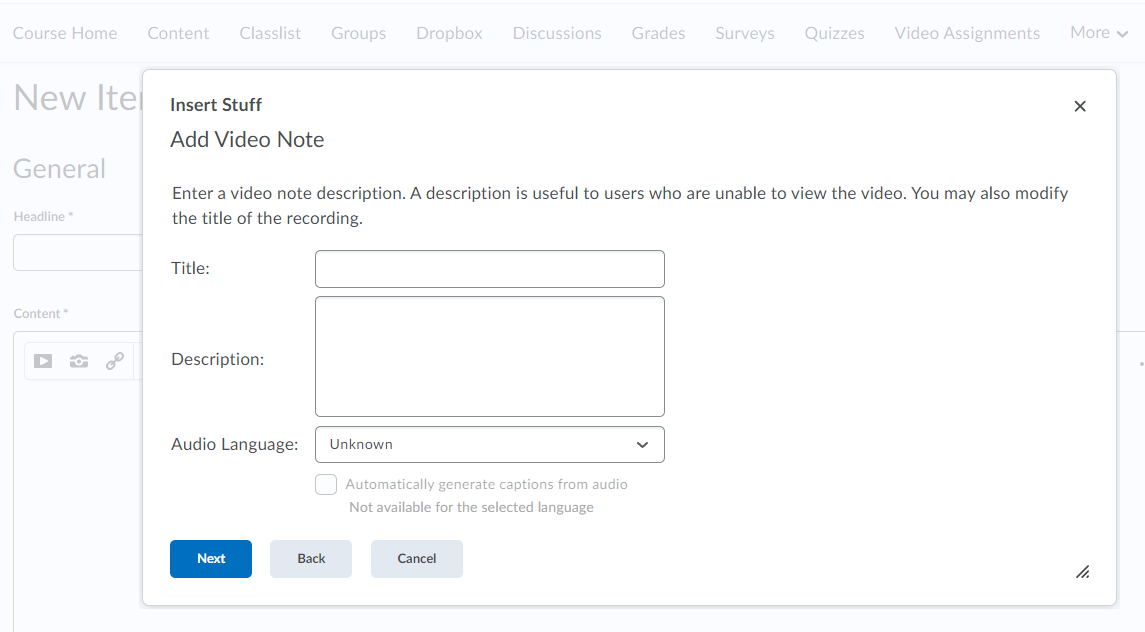
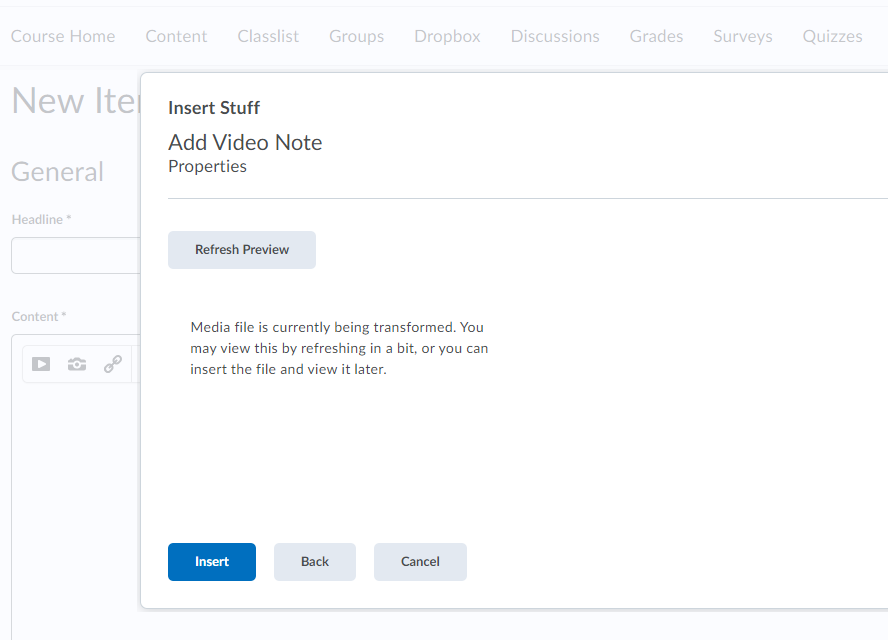
Add a Title and Description for your recording (optional).
Click Next.Click Insert
You should now see the recording appear under the Content section of the Announcement.
Select Publish to make the video available to students.


How to use Video Note in Content
Go to to Content section of your course and enter the content module you would like post in.
Click the button for Upload / Create and select Create a File from the drop down.
Enter a Title for your video
Select the Add Stuff icon.
Select the option for Add Video Note.
You will have two options available - Record Webcam Video or Upload File (if you already have an existing video that you would like to use).
If you’d like to Record Webcam Video, scroll down to where it says New Recording.
Click the New Recording button to start your recording.
Note: if this is the first time you are using the tool the browser will ask you to allow webcam permissions. Please enable this permissionClick Stop Recording when you are done with your video.
Review your recording at this step. If you’d like to try again click New Recording to restart the process. If you are satisfied with the recording click Next.
Add a Title and Description for your recording (optional).
Click Next.Click Insert.
You should now see the recording appear under the Content section of the post.
Select Save and Close to make the video available to students.


How to use Video Note in Discussions
Go to to Discussion section of your course and enter an existing Discussion Topic you would like post in.
.Click the button for Start a New Thread.
Enter a subject for your video
Select the Add Stuff button.
Select the option for Add Video Note.
You will have two options available - Record Webcam Video or Upload File (if you already have an existing video that you would like to use).
If you’d like to Record Webcam Video, scroll down to where it says New Recording.
Click the New Recording button to start your recording.
Note: if this is the first time you are using the tool the browser will ask you to allow webcam permissions. Please enable this permissionClick Stop Recording when you are done with your video.
Review your recording at this step. If you’d like to try again click New Recording to restart the process. If you are satisfied with the recording click Next.
Add a Title and Description for your recording (optional).
Click Next.Click Insert.
You should now see the recording appear under the Content section of the thread.
Select Post to make the video available to students.


How to use Video Note in Dropbox
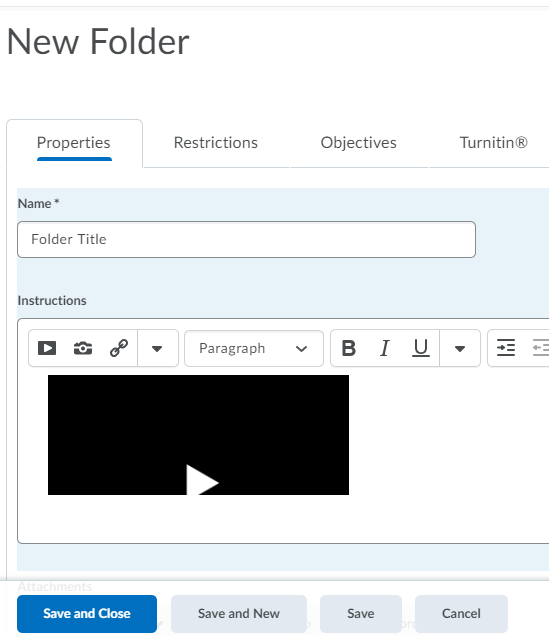
Go to to Dropbox section of your course and either Edit an existing Folder, or create a New Folder.
Enter a Name for your Dropbox folder.
Select the Add Stuff button.
Select the option for Add Video Note.
You will have two options available - Record Webcam Video or Upload File (if you already have an existing video that you would like to use).
If you’d like to Record Webcam Video, scroll down to where it says New Recording.
Click the New Recording button to start your recording.
Note: if this is the first time you are using the tool the browser will ask you to allow webcam permissions. Please enable this permissionClick Stop Recording when you are done with your video.
Review your recording at this step. If you’d like to try again click New Recording to restart the process. If you are satisfied with the recording click Next.
Add a Title and Description for your recording (optional).
Click Next.Click Insert.
You should now see the recording appear under the Instructions section of the folder.
Select Save and Close to make the video available to students.


Related Tools
Need More Help?
If you're still having trouble, please contact the CourseLink Support team for assistance.